Setup
Whether you choose a LAMMPS or Snakemake tutorial, the setup for Google cloud is the same!
For all tutorials you’ll need to install gcloud, and for storage tutorials you will need
to prepare some data in Google Storage.
Install
You should first install gcloud and ensure you are logged in and have kubectl installed:
$ gcloud auth login
Depending on your install, you can either install kubectl with gcloud:
$ gcloud components install kubectl
or just on your own. I already had it installed so I was good to go.
Prepare Data
This step is only required if you are doing a storage tutorial.
To start, prepare your data in a temporary directory (that we will upload into Google cloud storage):
$ git clone --depth 1 https://github.com/snakemake/snakemake-tutorial-data /tmp/workflow
You’ll want to add the Snakefile for your workflow along with a plotting script:
$ wget -O /tmp/workflow/Snakefile https://raw.githubusercontent.com/rse-ops/flux-hpc/main/snakemake/atacseq/Snakefile
$ mkdir -p /tmp/workflow/scripts
$ wget -O /tmp/workflow/scripts/plot-quals.py https://raw.githubusercontent.com/rse-ops/flux-hpc/main/snakemake/atacseq/scripts/plot-quals.py
You should have this structure:
$ tree /tmp/workflow
/tmp/workflow/
├── data
│   ├── genome.fa
│   ├── genome.fa.amb
│   ├── genome.fa.ann
│   ├── genome.fa.bwt
│   ├── genome.fa.fai
│   ├── genome.fa.pac
│   ├── genome.fa.sa
│   └── samples
│       ├── A.fastq
│       ├── B.fastq
│       └── C.fastq
├── Dockerfile
├── environment.yaml
├── README.md
├── scripts
│   └── plot-quals.py
└── Snakefile
We can then use Google Cloud (gcloud) to create a bucket and upload to it.
$ gcloud storage buckets create gs://flux-operator-storage --project=dinodev --location=US-CENTRAL1 --uniform-bucket-level-access
In the above, the storage class defaults to “Standard” Once we’ve created the bucket, let’s go to our snakemake data and upload the data to it.
$ cd /tmp/workflow
$ gcloud storage cp --recursive . gs://flux-operator-storage/snakemake-workflow/
You can either view your files in the Google Storage console
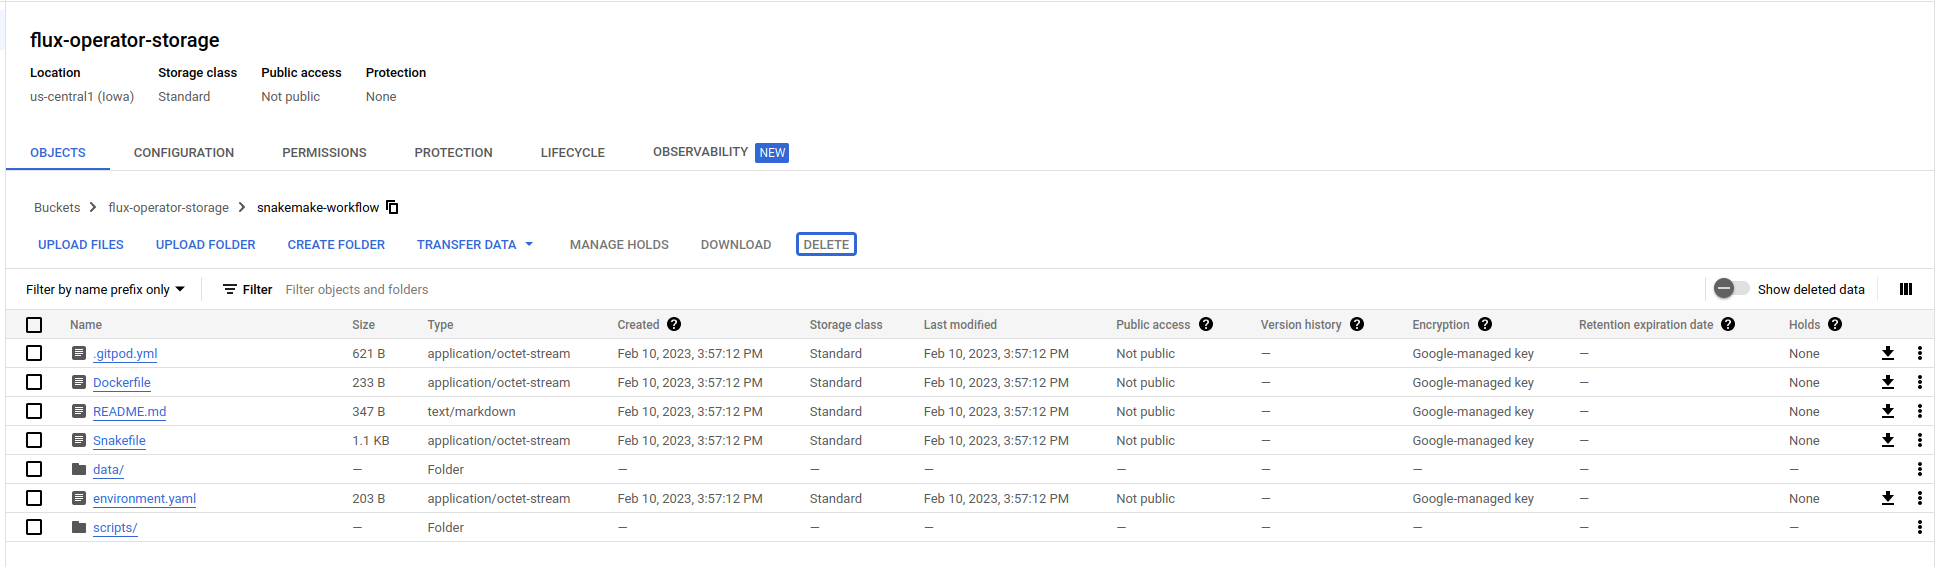
or view with gcloud again:
$ gcloud storage ls gs://flux-operator-storage/snakemake-workflow/
gs://flux-operator-storage/snakemake-workflow/.gitpod.yml
gs://flux-operator-storage/snakemake-workflow/Dockerfile
gs://flux-operator-storage/snakemake-workflow/README.md
gs://flux-operator-storage/snakemake-workflow/Snakefile
gs://flux-operator-storage/snakemake-workflow/environment.yaml
gs://flux-operator-storage/snakemake-workflow/data/
gs://flux-operator-storage/snakemake-workflow/scripts/
Permissions via Secrets
For storage tutorials, we will need to give permission for the nodes to access storage, and we can do that via these instructions to create a service account key (a json file) from a service account. E.g., I first created a custom service account that has these permissions:
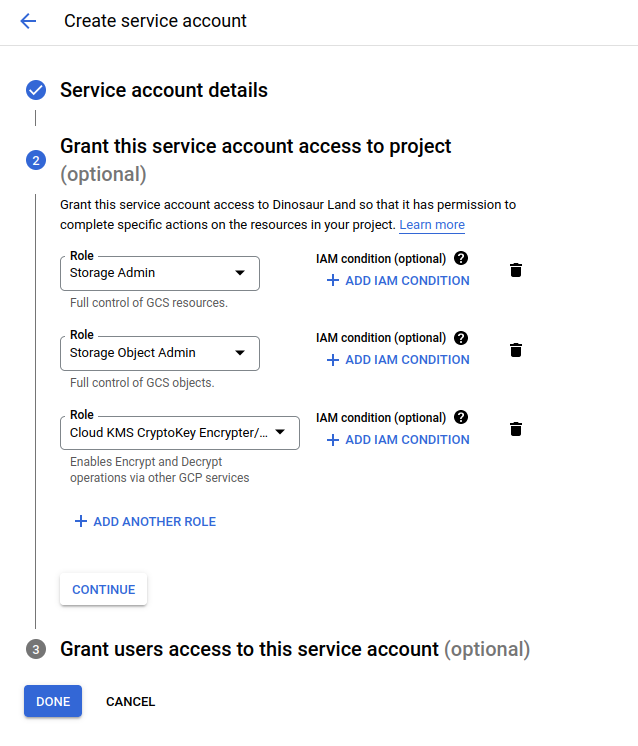
Note that for the fusion tutorial I also added Kubernetes admin to that. And then I could find the new identifier in a listing:
$ gcloud iam service-accounts list
DISPLAY NAME                            EMAIL                                               DISABLED
Compute Engine default service account  270958151865-compute@developer.gserviceaccount.com  False
flux-operator-gke                       flux-operator-gke@project.iam.gserviceaccount.com   False
And create a credential file:
$ gcloud iam service-accounts keys create <FILE_NAME>.json --iam-account <EMAIL>
And create a secret from it! This is basically giving your cluster permission to interact with a specific bucket.
$ kubectl create secret generic csi-gcs-secret --from-literal=bucket=flux-operator-storage --from-file=key=<PATH_TO_SERVICE_ACCOUNT_KEY>
If you ever need to list your accounts again (e.g., you’ll need the email in the Fusion tutorial):
$ gcloud iam service-accounts list
Next you can proceed to choose one of the other tutorials mentioned here.